2 Day Shipping for Kits in the USA!


Dermaplaning with acne-prone skin? Tricky, but doable. Never dermaplane over active breakouts—you'll just spread bacteria and make things worse. Wait until your skin's fully healed, then use clean tools and gentle products afterward. Skip harsh actives for a few days pre-treatment, and always follow with a solid skincare routine targeting all four acne drivers. Exposed's 4-Step System handles the aftermath perfectly, so you won't sabotage those freshly revealed skin cells.


Biggest Takeaways
- Dermaplaning should only be performed on fully healed skin, never on active acne breakouts to prevent spreading bacteria.
- Wait until all active breakouts have healed, then use dermaplaning to help fade post-acne scars and improve texture.
- Proper pre-treatment includes avoiding harsh actives 3-5 days before and using gentle cleansers to prepare skin.
- Post-treatment, use Exposed's salicylic acid cleanser, toner, and non-comedogenic moisturizer to prevent new breakouts.
- Exposed's 4-Step System targets all four acne drivers while complementing dermaplaning's exfoliation benefits.
What Is Dermaplaning and How Does It Affect Acne?

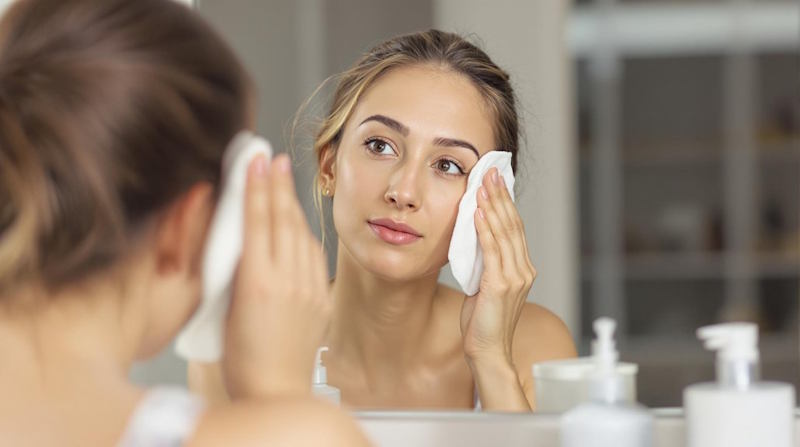
Facial fuzz frustrations have launched dermaplaning into skincare stardom, but let's cut through the hype. This trendy exfoliation method uses a surgical scalpel to scrape away dead skin cells and peach fuzz, promising that goddess-level glow everyone's after.
But here's the reality check for dermaplaning acne: it's a hard no if you've got active breakouts. That blade sliding across inflamed pimples? Recipe for disaster. The friction can worsen inflammation and spread bacteria faster than gossip at brunch.
While dermaplaning might help with post-acne scars once your skin's healed, it won't fix current breakouts. The procedure actually risks triggering more inflammation—the exact thing your angry skin doesn't need.
Smart move? Wait until your acne's calmed down before considering this treatment.
The Science Behind Dermaplaning for Acne-Prone Skin
Let's get technical for a second—beyond the trendy Instagram posts showing pretty women scraping their faces.
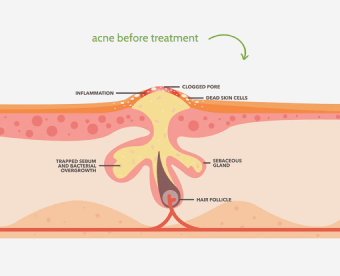
Dermaplaning works by physically removing the top layer of dead skin cells along with pesky vellus hair (hello, peach fuzz!). This exfoliation process does two essential things for acne-prone folks: it unclogs pores that would otherwise become breeding grounds for breakouts and kickstarts cell turnover.
Dermaplaning: where dead skin cells check out and cell turnover checks in—giving your acne-prone skin the fresh start it craves.
When your skin cells regenerate faster, those stubborn post-acne marks fade quicker. It's like hitting the reset button on your complexion.
But timing is everything—dermaplaning active breakouts is a hard no. You'll just spread bacteria and irritation across your face (yikes).
The science is solid, but don't let anyone tell you it's a miracle cure. It addresses just one acne driver: clogged pores.
Common Mistakes That Trigger Post-Dermaplaning Breakouts

Despite the glowing reviews from influencers, dermaplaning can turn your face into breakout city if you're not careful.
The post-scrape pimple fest isn't random—it's usually because you've made one of these rookie mistakes:
-
Jumping the gun on active acne—wait until existing breakouts heal or you'll just spread bacteria across your face
-
Using dirty tools (yikes!)—would you shave with your roommate's razor? Didn't think so
-
Going ham with harsh products after—your skin barrier is basically naked after dermaplaning, so chill with the acids
-
Skipping sunscreen—freshly scraped skin is extra vulnerable to UV damage
Most dermaplaning disasters happen because you're only addressing one acne driver while ignoring the other three.
This piecemeal approach is why most people's skin freaks out post-treatment.
Pre-Dermaplaning Prep: Setting Your Skin Up for Success
Proper prep work makes the difference between dermaplaning success and a face full of regrets. Here's how to set yourself up for smooth sailing:
First, make certain all active breakouts have completely healed. Dragging a blade over inflamed pimples? Big yikes.
Next, ditch those harsh actives 3-5 days before your appointment. That means shelving your retinols and exfoliating acids that make your skin extra sensitive.
Hold the retinols and acids for 3-5 days pre-treatment. Your skin needs a break before blade meets face.
Before your session, cleanse with a gentle, fragrance-free face wash. You want a completely clean canvas—oil and makeup residue are dermaplaning's worst enemies.
Talk to your pro about your specific skin concerns too. Their expertise guarantees the treatment's tailored to your needs, not some one-size-fits-all approach that leaves you wondering why you bothered.
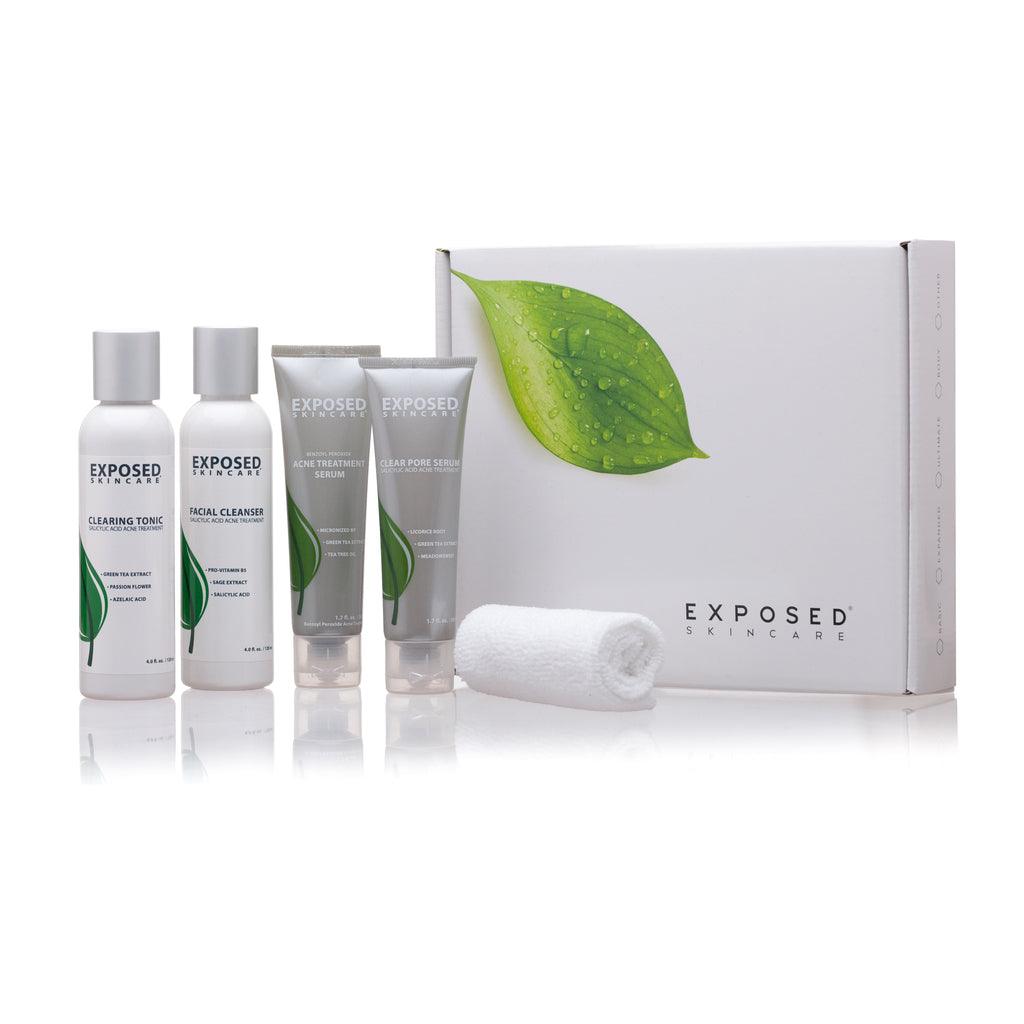
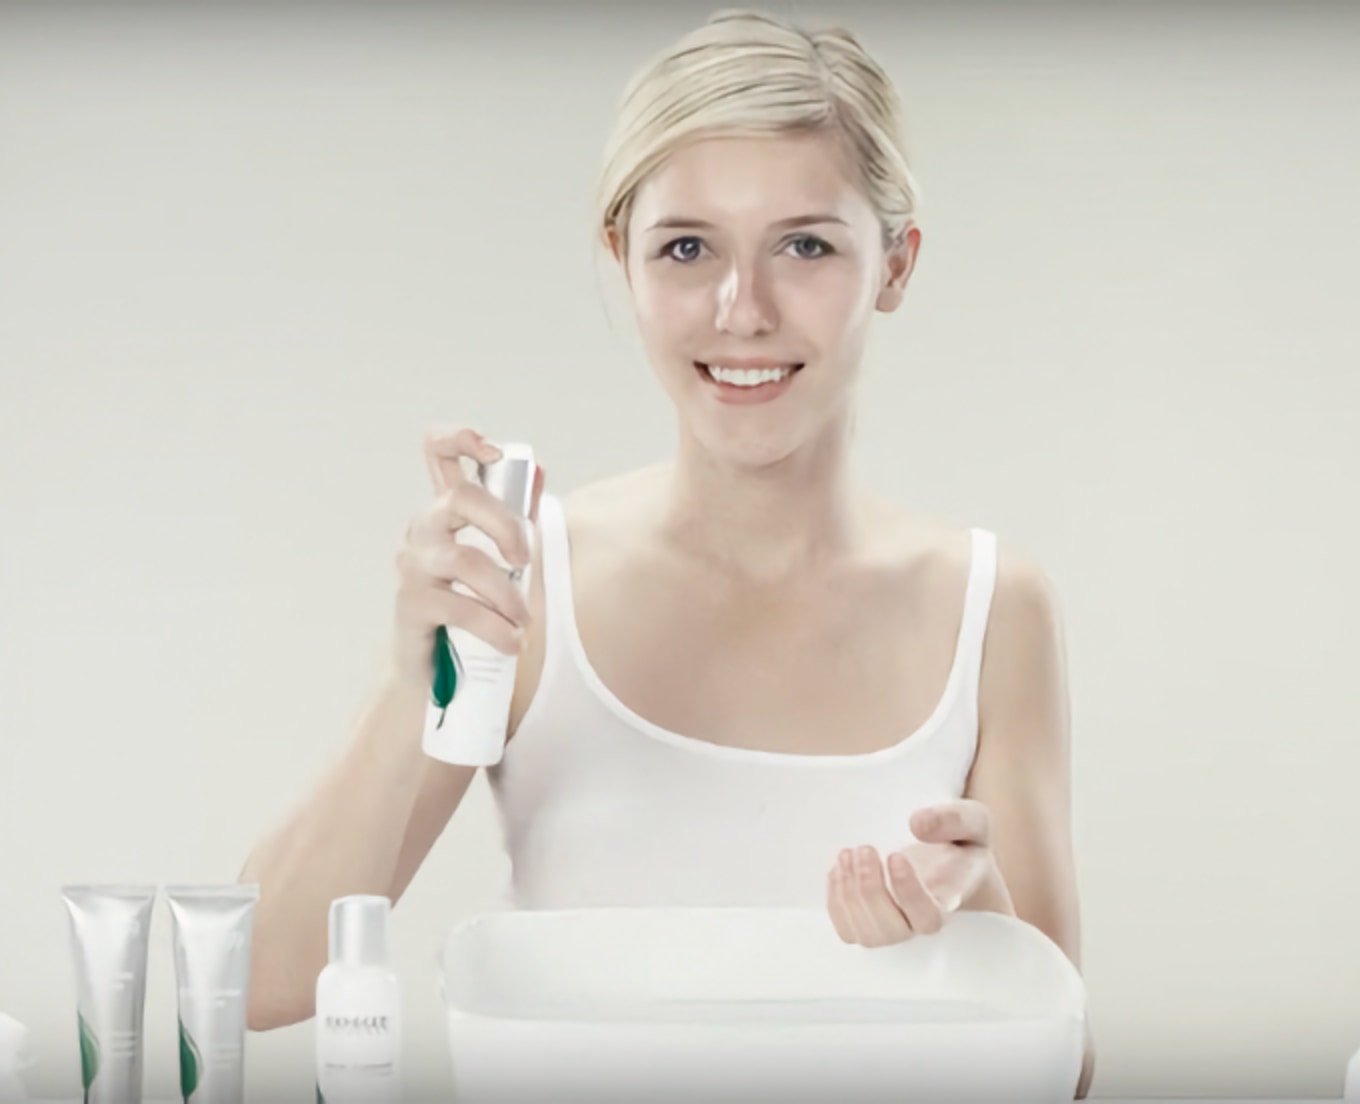
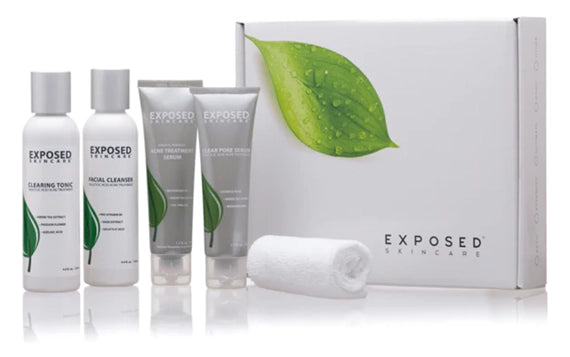
Post-Dermaplaning Care With Exposed's 4-Step System

After your dermaplaning session, your stripped-down skin needs serious TLC, not the random products most people slap on.
Your freshly exfoliated face is extra vulnerable—perfect timing for Exposed's science-backed 4-Step System to prevent the post-scrape breakout drama.
-
Cleanser: The salicylic acid formula washes away debris without that tight, desert-dry feeling other cleansers leave behind
-
Toner: Rebalances your skin's pH (because dermaplaning throws that all out of whack) and keeps breakouts from crashing your smooth-skin party
-
Treatment Serum: Tackles inflammation before it starts with acne-fighting ingredients that don't burn like fire
-
Moisturizer: Hydrates without turning your face into an oil slick—crucial when your skin barrier's basically wearing a "kick me" sign
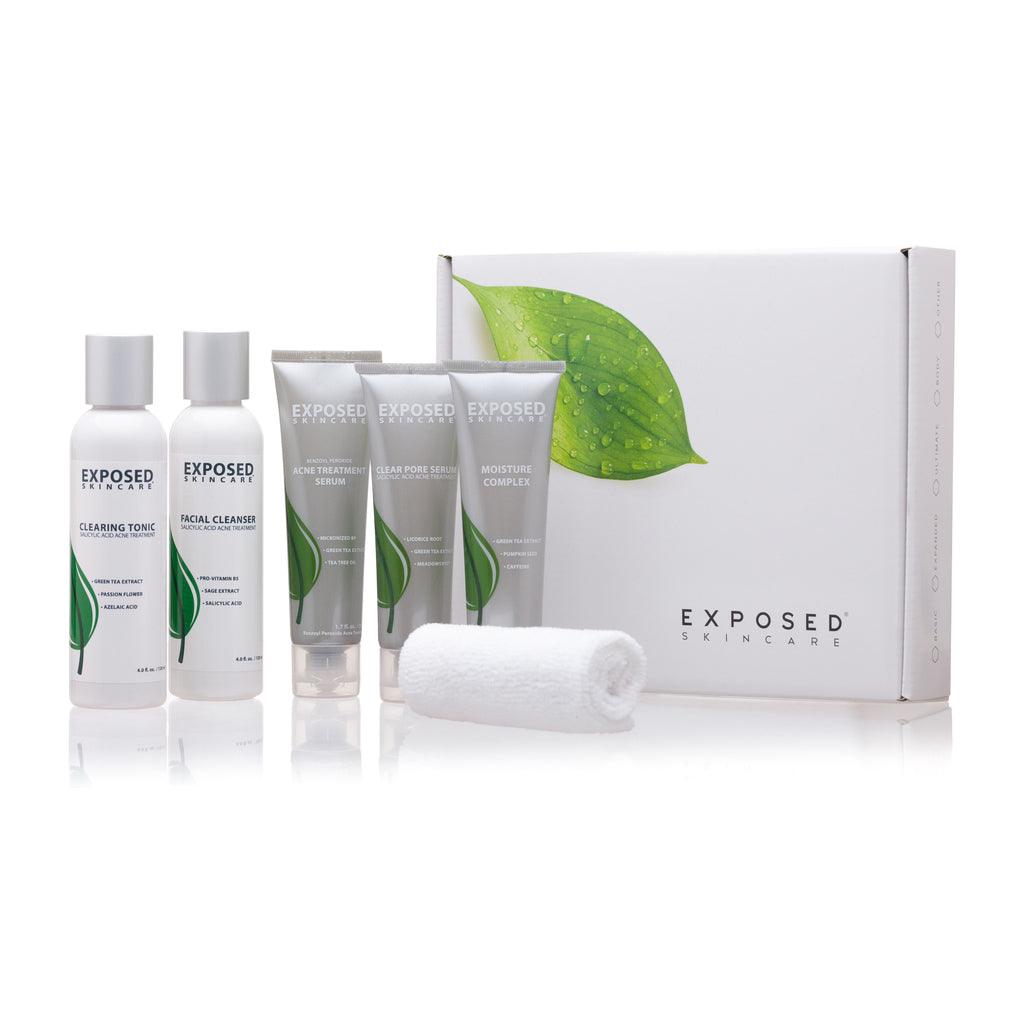
How Exposed Targets All Four Acne Drivers After Dermaplaning
Dermaplaning leaves your skin like a blank canvas—perfect, but also totally vulnerable. This is when your post-care routine really matters.
Exposed's system is basically your skin's bodyguard, targeting all four acne troublemakers at once.
Your skin needs a multi-talented defender, not a one-trick solution—Exposed hits acne from all angles when your skin is most vulnerable.
While most products only tackle one acne driver (leaving the other three to party on your face), Exposed's formula hits everything: The Facial Cleanser controls oil without stripping, Clearing Tonic calms inflammation with green tea, Daytime Serum kills bacteria with benzoyl peroxide, and Nighttime Serum keeps pores clear with salicylic acid.
It's like having a security detail for your freshly dermaplaned skin. No wonder their success rate is 98%—they're not playing whack-a-mole with just one acne factor like those one-trick-pony products.
Real Results: Before and After Dermaplaning With Exposed
The proof is always in the pudding—or in this case, in the jaw-dropping before-and-after photos from real Exposed users who've combined dermaplaning with the complete skincare system.
Let's cut the fluff—here's what actually happens when you pair professional dermaplaning with Exposed's four-driver approach:
-
That immediately smoother texture everyone raves about? It's legit—and your makeup will finally stop catching on rough patches.
-
Acne scars and discoloration become noticeably less visible (not invisible—we're honest here).
-
Those fine lines that seemed to appear overnight? They'll soften up faster than you can say "I'm too young for wrinkles."
-
The results compound over time—unlike those one-hit-wonder treatments that leave you back at square one.
Your skin doesn't just look better temporarily—it actually gets healthier with each treatment.
Dermaplaning at Home vs. Professional Treatment for Acne Sufferers

So you've seen those incredible before-and-afters and you're itching to scrape your face with a tiny razor.
Let's pump the brakes for a sec. When it comes to acne-prone skin, there's a world of difference between pro treatments and DIY dermaplaning.
Licensed estheticians bring sterile tools, proper technique, and the ability to actually assess your skin condition before going blade-happy.
Meanwhile, at-home attempts often lead to nicks, bacterial spread (hello, new breakouts!), and compromised skin barriers.
The pros also pair the treatment with acne-appropriate products that won't trigger fresh eruptions.
Professional treatments combine dermaplaning with skin-friendly formulations that keep breakouts at bay—unlike your bathroom cabinet experiments.
Your bathroom mirror session? Not so much.
Bottom line: If you're serious about dermaplaning with acne, skip the TikTok tutorials and book an appointment.
Your face deserves better than amateur hour.
Frequently Asked Questions
How to Dermaplane With Acne Prone Skin?
Wait until breakouts heal completely, then use sterile, single-use blades. Post-treatment, apply Exposed's multi-factor system to prevent new acne by addressing all four drivers of breakouts simultaneously.
What Happens if I Dermaplane Over Acne?
Dermaplaning over active acne can spread bacteria, worsen inflammation, and potentially cause scarring. You'll risk turning minor breakouts into bigger problems that take longer to heal. Always wait for clearance first.
How to Not Get Acne After Dermaplaning?
Worried about post-dermaplaning breakouts? Cleanse with a gentle formula, avoid active ingredients for 3 days, moisturize with non-comedogenic products, and apply sunscreen daily. Exposed's balanced system targets all four acne drivers simultaneously.
Putting It All Together
You're now armed for dermaplaning success—but only when your acne's actually under control. Funny enough, the day you stop obsessing over dermaplaning is usually when your skin's finally ready for it. With Exposed's system tackling all four acne triggers, you'll create that stable canvas those trendy Instagram tutorials never mention. Remember: dermaplaning isn't your acne solution—it's the reward for solving it first.